App release
This document outlines how to build the Totara Mobile app deliverables for iOS and Android within a local environment. First, you will need to set up the code base with all the dependencies. The setup guide can be found in the Getting started with the Totara Mobile app page of this documentation.
Android release build
To release an Android app to the app store, there are a couple of methods you can use. For the Totara Mobile app, there’s no difference from a regular Android app release, which is well documented in official Android documentation.
Add the following properties at the end of the file android/gradle.properties
MYAPP_RELEASE_STORE_FILE=<replace>
MYAPP_RELEASE_STORE_PASSWORD=<replace>
MYAPP_RELEASE_KEY_ALIAS=<replace>
MYAPP_RELEASE_KEY_PASSWORD=<replace>
The app file can be generated using the Android App Bundles format (.aab) or the .apk format. The format.aab is recommended as it will help reduce the app size, installation time, and bandwidth consumption.
AAB
Run the following command to build the release ABB file:
yarn local:android-release-aab
The .aab file can be found in app/build/outputs/bundle/prodRelease/.
APK
Run the following command to build the release APK file:
yarn local:android-release-apk
The above command will create the APK file (app-release.apk) in the folder. android/app/build/outputs/apk/. This can be used to publish on Google Play for public release or internal testing. It can also be directly installed on an Android device.
Resources
Below are links to relevant resources from Google and Android.
https://play.google.com/console/about/internal-testing/
https://developer.android.com/distribute/best-practices/develop/in-app-a-b-testing
https://developer.android.com/studio/command-line/adb#move
iOS release build
The Apple provisioning information (bundle identifier and distribution certificate) are essential for an iOS build. Refer to the preparing for distribution guide on Apple's developer help site.
Setup provisioning
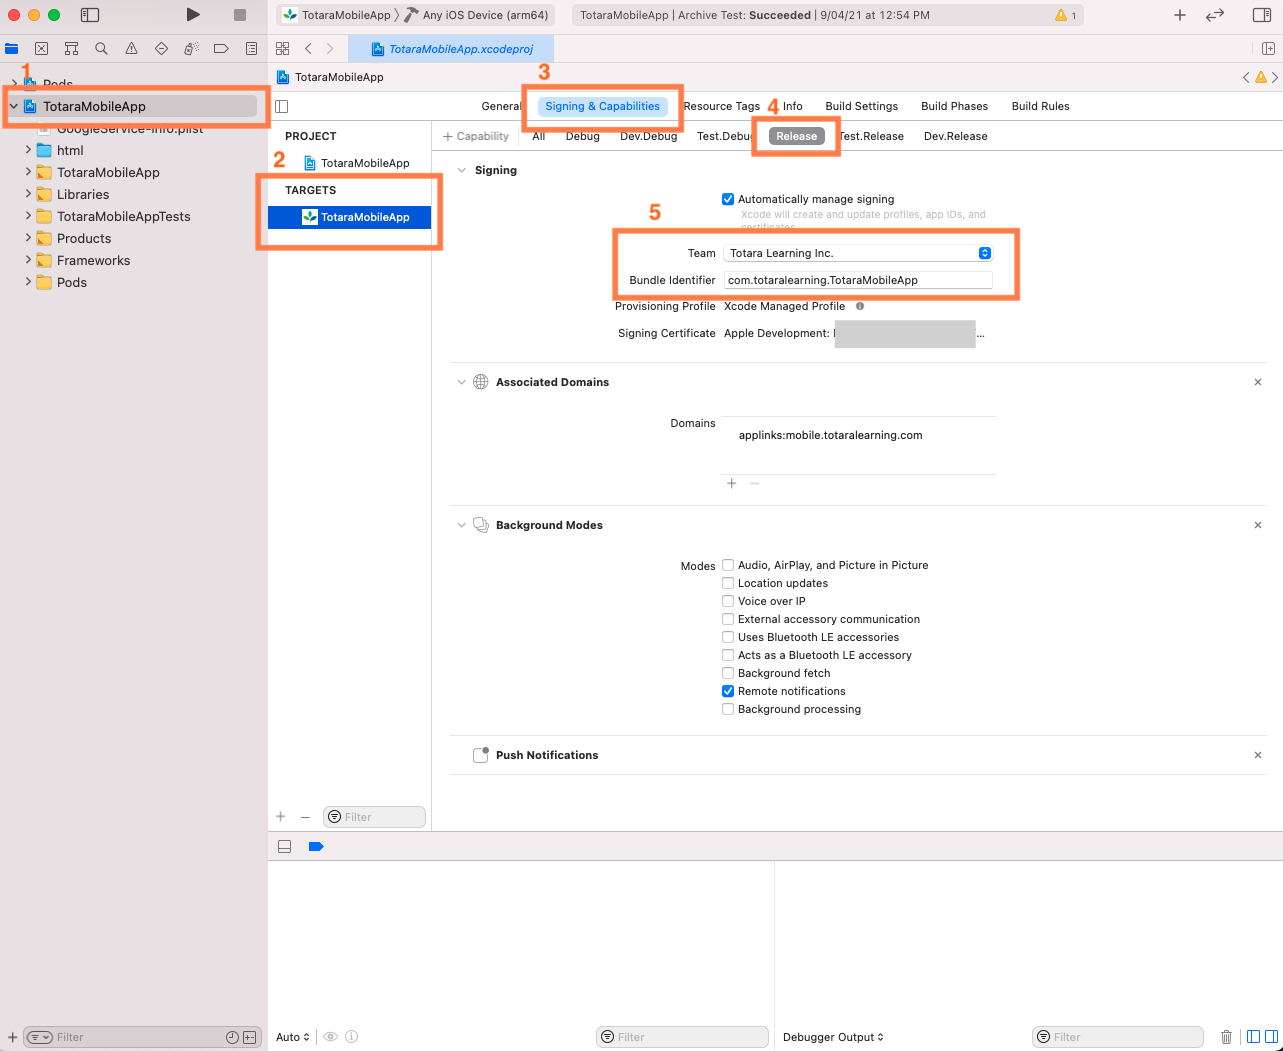
Open the iOS project(./ios/TotaraMobileApp.xcworkspace) with XCode and select Signing & Compatibilities settings for the Release schema of the app.
The screenshot below illustrates what you need to have selected.
- Select the project (e.g.TotaraMobileApp)as shown in (1) on the screenshot
- Select the target (.e.g TotaraMobileApp as sown in (2) on the screenshot
- In the top row of tabs select the settings for Signing & Capabilities, as shown in (3) on the screenshot
- From the next row of tabs, for the schema select Release, as shown in (4) on the screenshot
- Change the Bundle Identifier and Team settings which are associated with the provision profile, as shown in (5) on the screenshot
Submit iOS build
There are a few ways to submit a release build to the app store for publishing or beta testing. More information can be found on Apple's help site.
The following describes how to create a release build using Xcode:
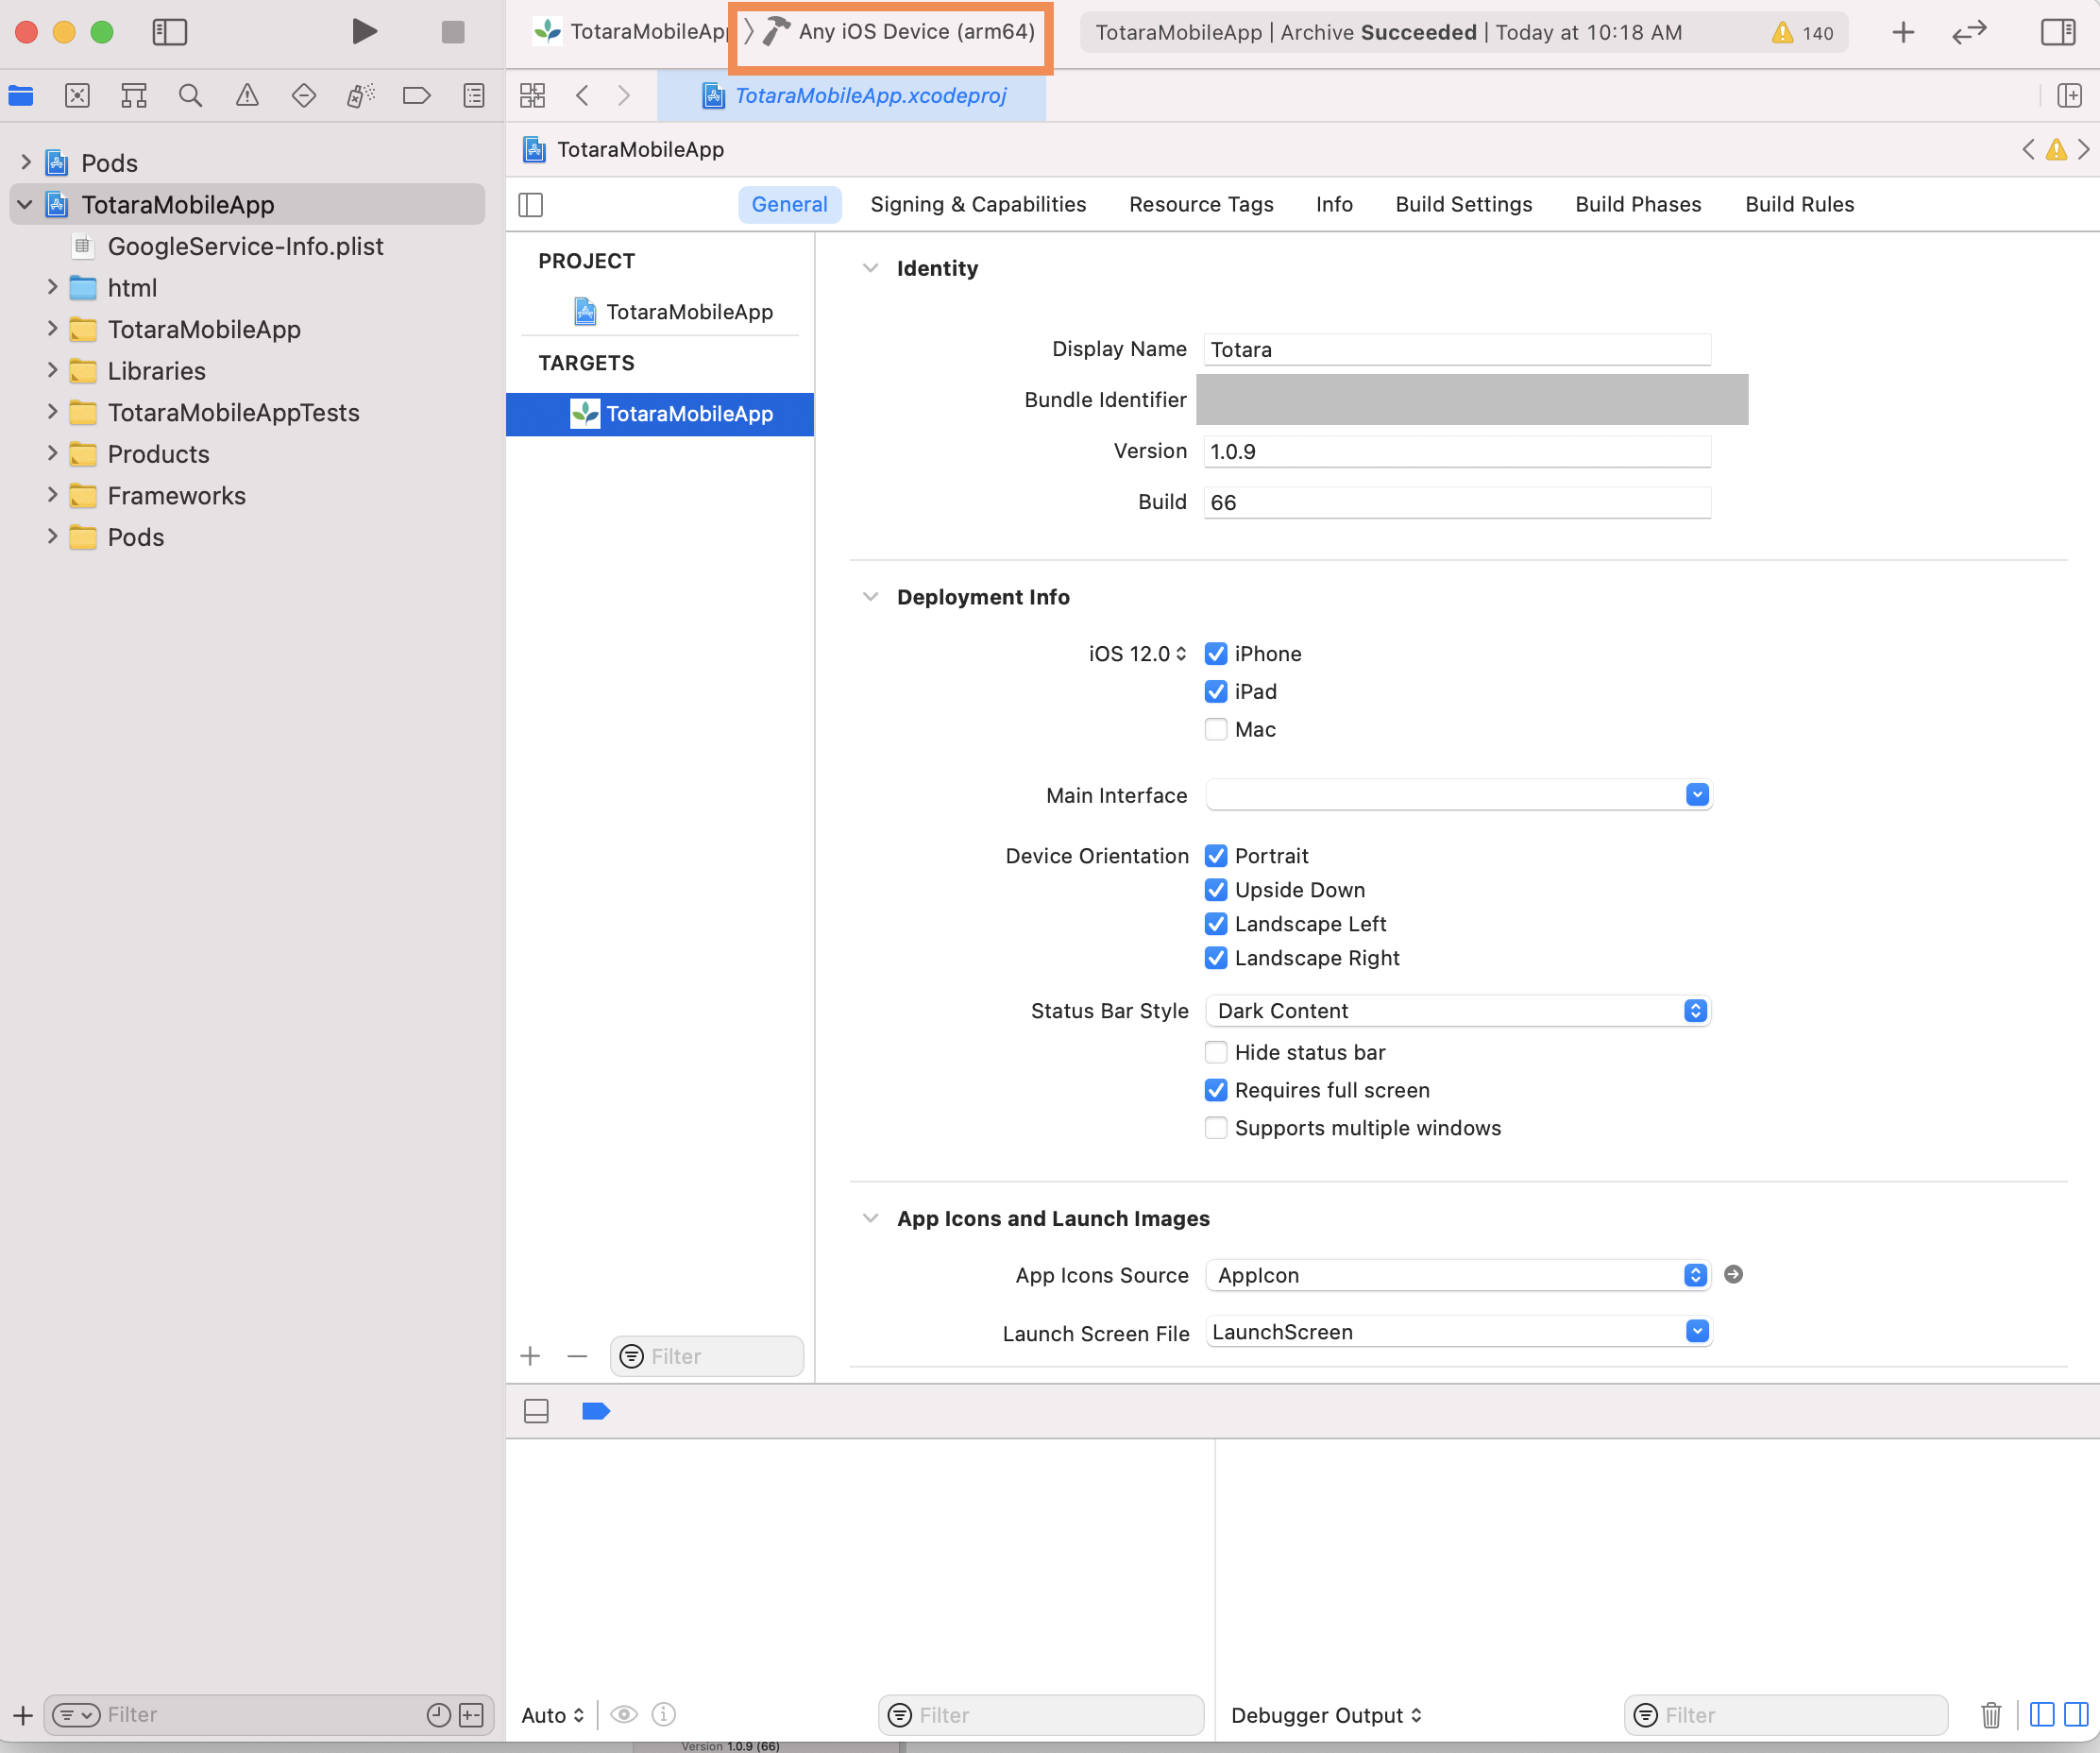
- First, you will be required to archive the app for any device. So select build target for any device as shown below.
- Go to Product > Archive from Xcode top main menu.
- Once archiving has finished, it will show the Archives window with the existing list of archives.
- Select the relevant version and click on the Distribute App option.
- Select the required mode of delivery and follow the steps accordingly.
- App Store connect: Submits a build directly to the app store or test flight
- Ad Hoc: Enables the build to be exported to the local machine
The Ad Hoc export build will generate an .ipa file to a given export location. This can be directly installed on registered devices that have a connection to the local machine.
Resources
Below are a number of links to relevant resources from Apple.
https://developer.apple.com/documentation/xcode/preparing_your_app_for_distribution

